...
| View file |
|---|
| name | Hotspotless v04.svg |
|---|
| height | 250 |
|---|
|
Step-by-step guide
- Check the Computer Requirements:
- PC needs to have a LAN-port for cabled Network connections
- PC needs to additionally allow WiFi-connections
- Disconnect the WiFi
- For the setup procedure temporarily disable all WiFi-connections on the PC!
- Connect the LAN-cable
- Connect the customers LAN-cable which is providing Internet access to LAN-port of the PC
- Make sure the cable is undamaged and properly connected
- Make sure the cable is working e.g. by opening a browser and performing a basic Google-search "www.google.com"
- Check the cable/Internet Requirements:
- Using the browser navigate to the corpus.e Box: https://box.shooiq.com/
- Open and start the "Cloud Connection Test" - which can be found in the lower left corner:

- If any of the tests fails or results in a Timeout let the IT check and fix the requirements:
https://download.shooiq.com/software/manuals/shooIQ_Requirements.pdf
- Prepare the Scanner/Mover:
- Make sure the plate/stage is powered ON
- Put the Mover at the magnetic Parking position
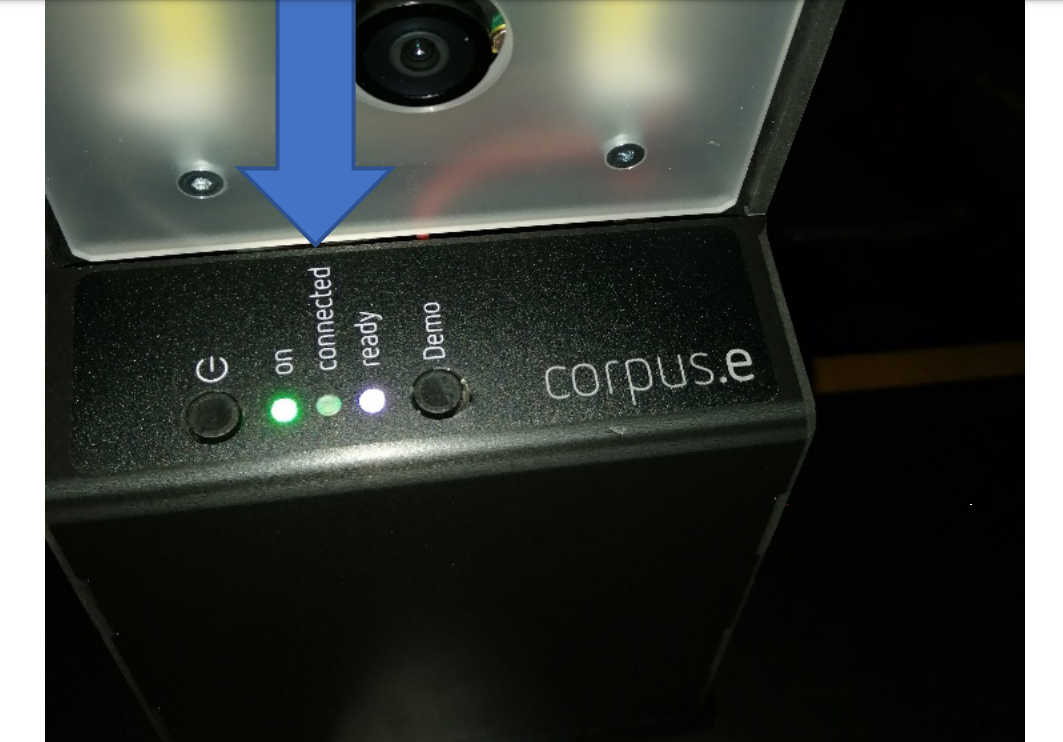
- Switch the Mover on ... after 10-20 seconds the LEDs should look like this:
(the LED named "connected" does NOT have to be lit up! - it's merely optional)
- Connect the WiFi to the Scanner:
- Enable the WiFi of the PC again!
- Connect to the WiFi of the Scanner/Mover by selecting the entry "lightbeam_xxxxxxxxxxxx"
where the number represents the #Serial of the Mover, e.g.
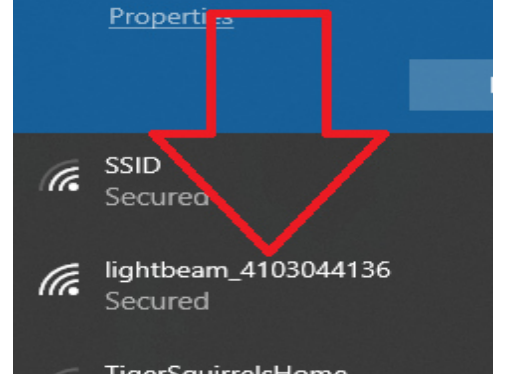
- Use and store the password "wireless" for this connection
- NOTE: Ignore the warning, that this new WiFi connection does not provide Internet access!
=> This is absolutely normal as it's a local connection only
- Check the Scanner connection:
- Start the shooIQ-Software
- Login using your credentials
- Use the lower navigation bar to select the layer "Feet / Scan"
- After 0-20 seconds the screen should look something like this:
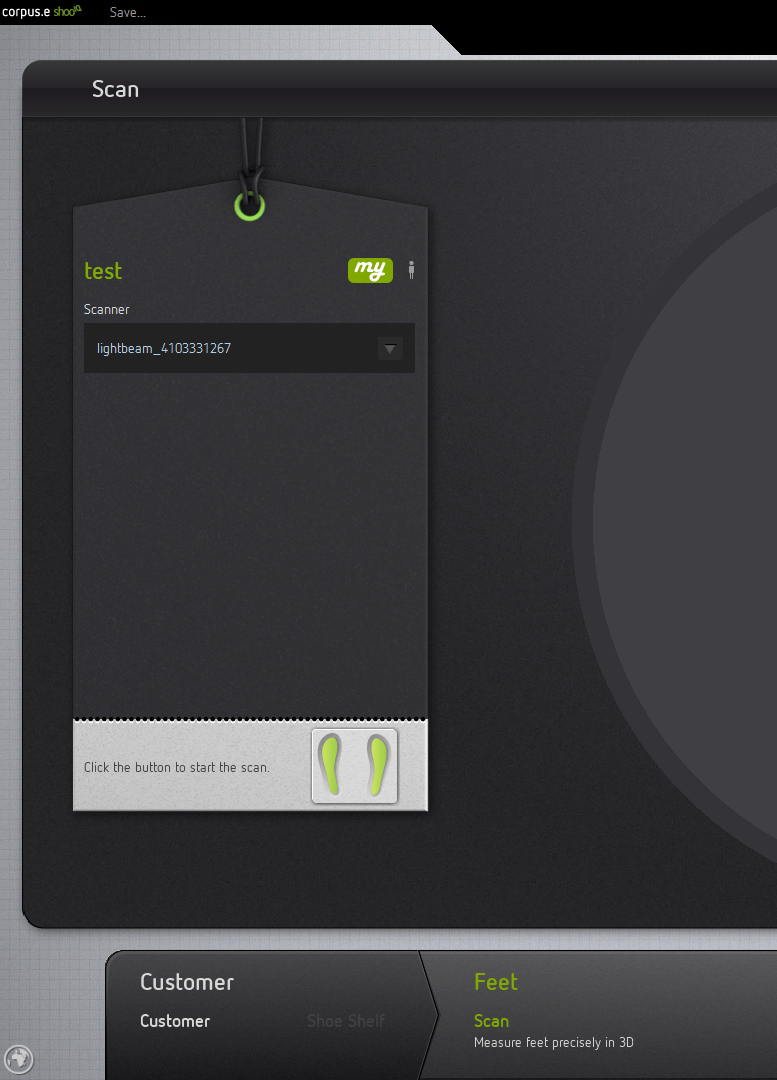
- The box named "Scanner" will show the serial number of the Mover
- The two little feet on the button will turn green -
indicating that everything is ready and a scan can be started!!!
- If this should not be the case let the IT check the Firewall- and AntiVirus-settings of the PC
The Computer has to allow/accept free communication to and from the WiFi-connection above
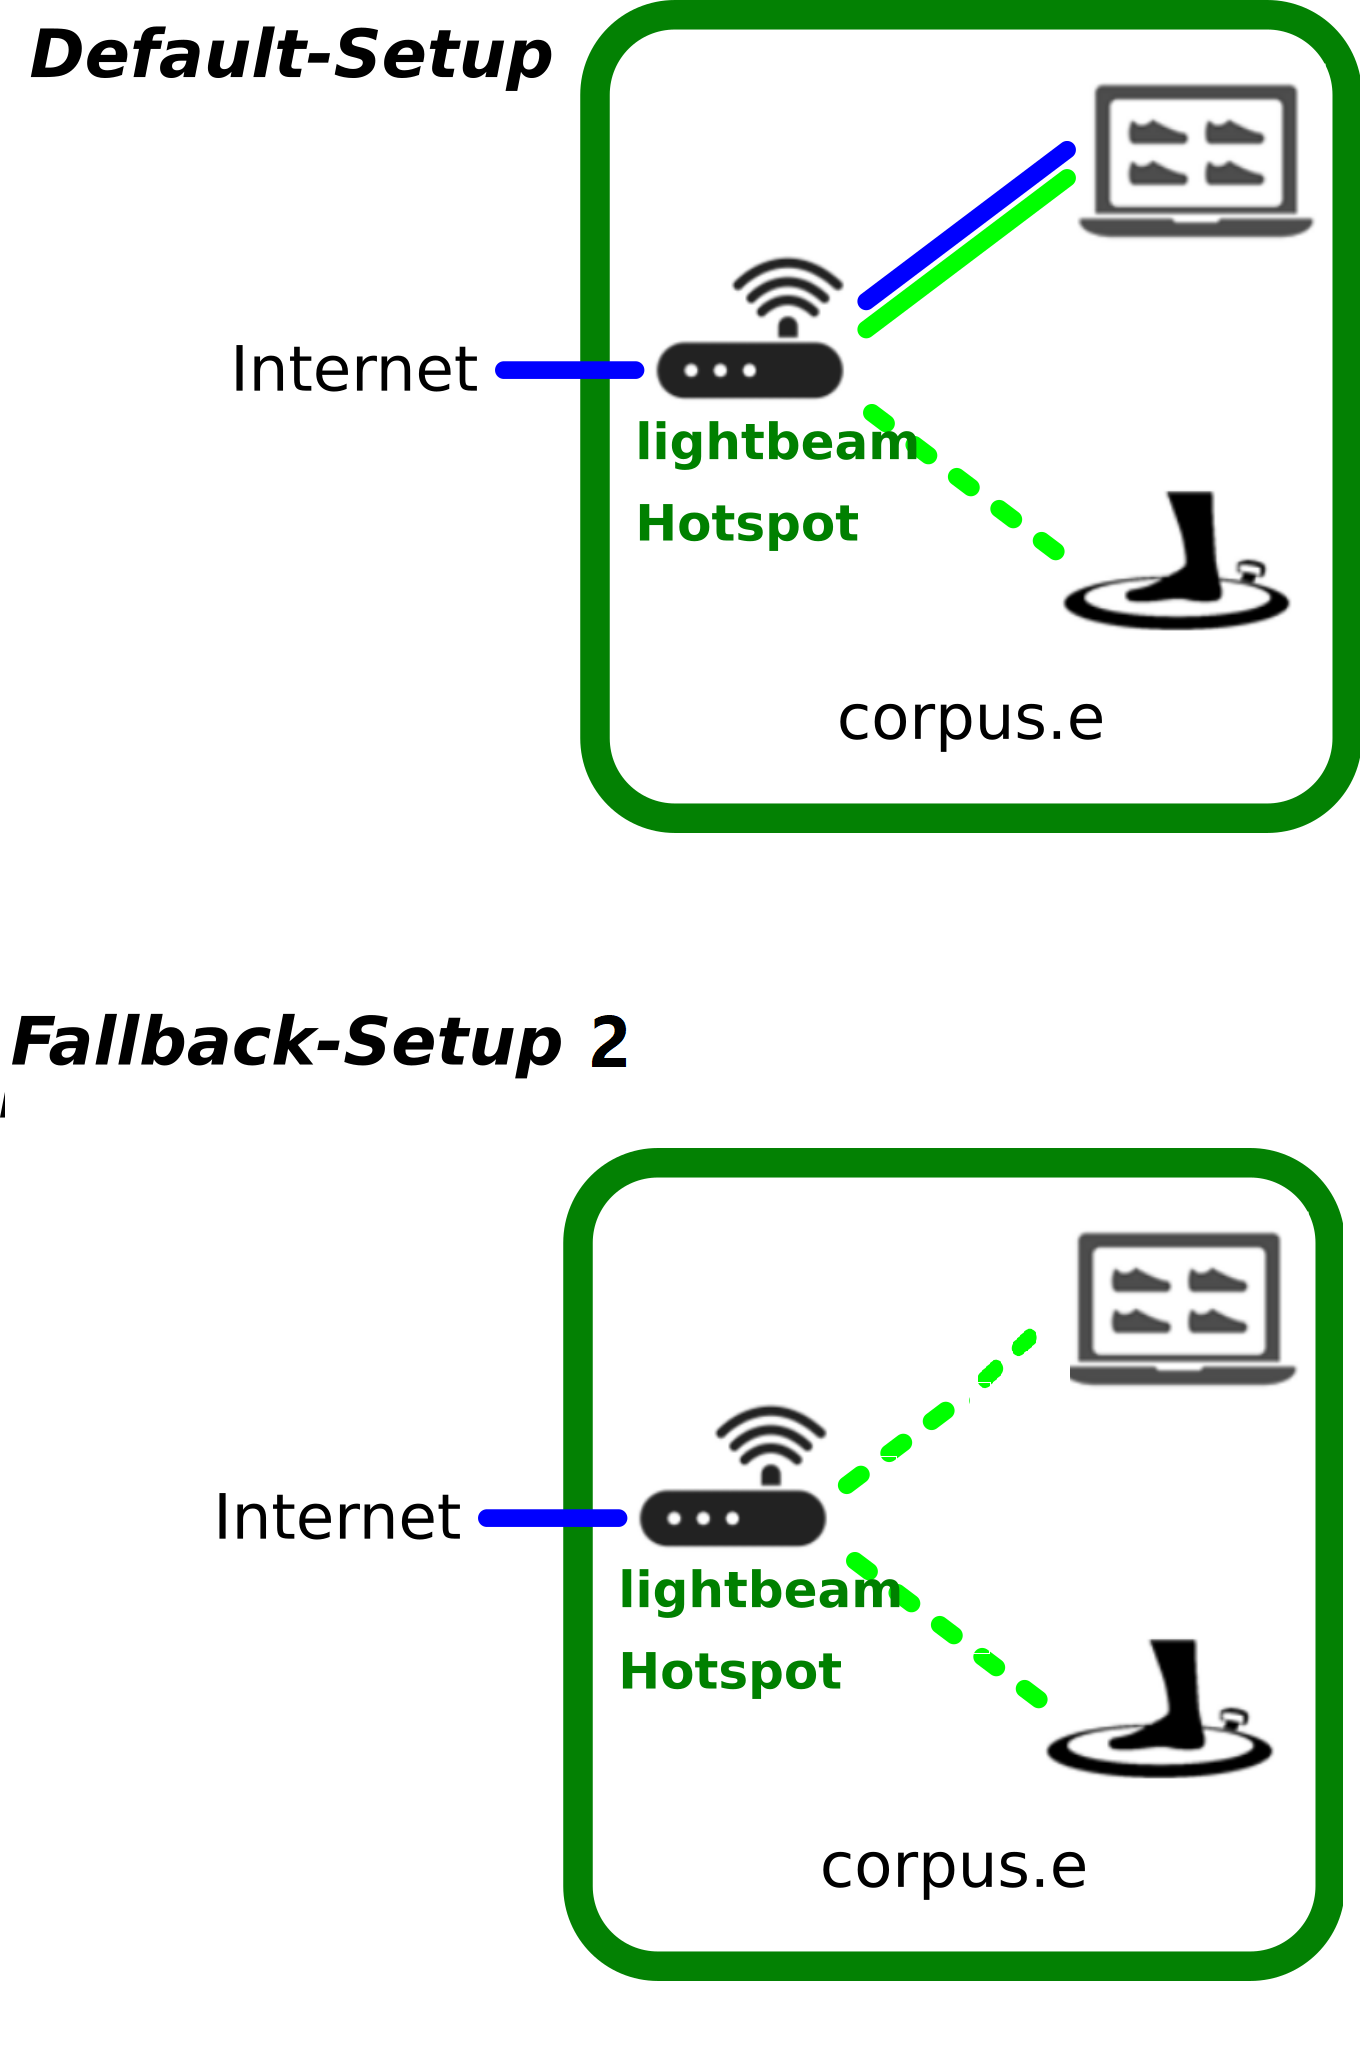
The following steps will describe how to create an alternative Fallback-Setup 2 in case the hotspot and computer are only connected via WiFi:
Image Added
Step-by-step guide
- Check the Computer Requirements:
- PC needs to allow WiFi-connections
- The PC needs to be in reach of the Hotspot router's Wifi signal
- Connect the LAN-cable
- Connect the customers LAN-cable which is providing Internet access to the LAN-port of the Hotspot
- Connect the PC to the Wifi network of the Hotspot usually "lightbeam_hotspot"
- Make sure the cable is working e.g. by opening a browser and performing a basic Google-search "www.google.com"
- Check the cable/Internet Requirements:
- Using the browser navigate to the corpus.e Box: https://box.shooiq.com/
- Open and start the "Cloud Connection Test" - which can be found in the lower left corner:
Image Added - If any of the tests fails or results in a Timeout let the IT check and fix the requirements:
https://download.shooiq.com/software/manuals/shooIQ_Requirements.pdf - Set "lightbeam_hotspot" as the default Wifi network: WLAN Priorität, automatisches Verbinden unter Windows 10 ändern
- Prepare the Scanner/Mover:
- Make sure the plate/stage is powered ON
- Put the Mover at the magnetic Parking position
- Switch the Mover on ... after 10-20 seconds the LEDs should look like this:
(the LED named "connected" does NOT have to be lit up! - it's merely optional)
Image Added
- Check the Scanner connection:
- Start the shooIQ-Software
- Login using your credentials
- Use the lower navigation bar to select the layer "Feet / Scan"
- After 0-20 seconds the screen should look something like this:
Image Added - The box named "Scanner" will show the serial number of the Mover
- The two little feet on the button will turn green -
indicating that everything is ready and a scan can be started!!!
- If this should not be the case let the IT check the Firewall- and AntiVirus-settings of the PC
The Computer has to allow/accept free communication to and from the WiFi-connection above
Related articles
| Content by Label |
|---|
| showLabels | false |
|---|
| max | 5 |
|---|
| spaces | faq |
|---|
| showSpace | false |
|---|
| sort | modified |
|---|
| reverse | true |
|---|
| type | page |
|---|
| cql | label = "kb-how-to-article" and type = "page" and space = "faq" |
|---|
| labels | kb-how-to-article |
|---|
|
...