Most network problems can be easily fixed by checking & ensuring the default-settings again
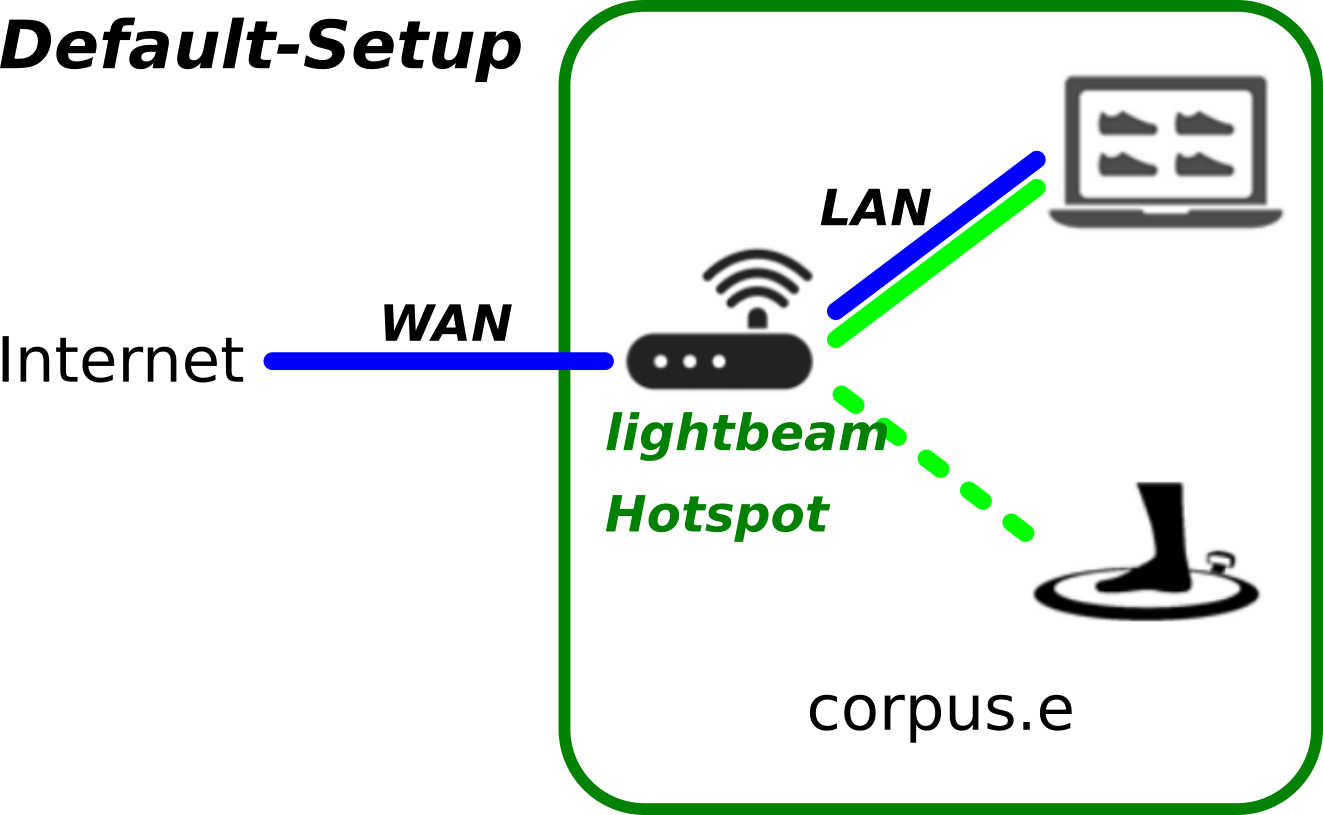
The lightbeam2 Setup consists of the PC, the Scanner and a Hotspot - Setting up the system in most cases is simply Plug&Play:
- Connect the Internet-cable of the customer to the provided Hotspot
- Power-ON all participating devices
- DONE!

Step-by-step guide
- Prepare and connect the Hotspot:
- Make absolutely sure you are using THE Hotspot that was provided with the Scanner!
Make sure the Hotspot is new and has not been reconfigured / changed previously => This is crucial for Plug&Play!
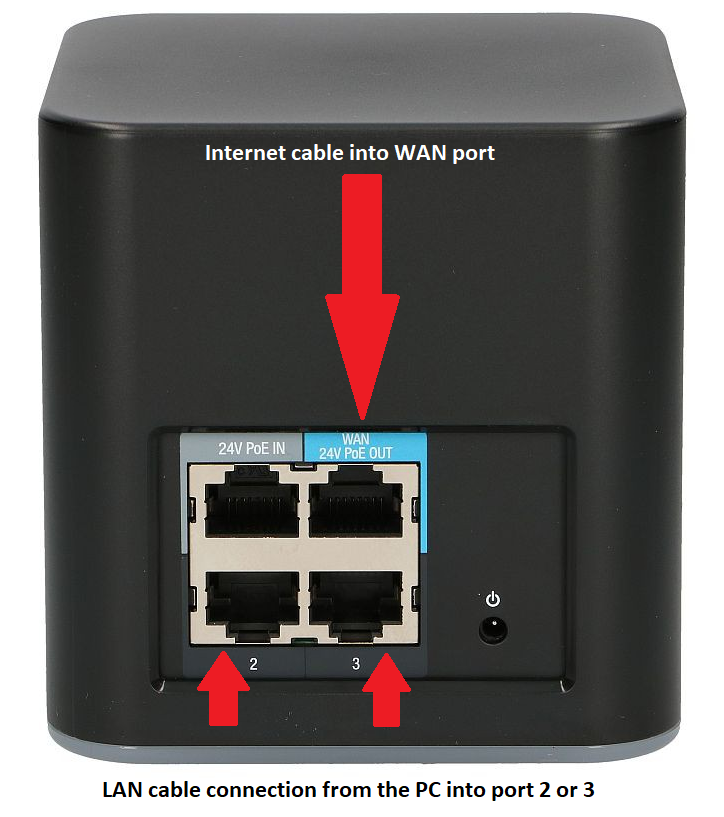
[ If you have reason to believe your Hotspot does NOT have the default settings anymore please contact the Support! ]- Connect the Internet-cable provided by the shop/customer to the "WAN"-port of the Hotspot => Do NOT connect this cable to one of the Hotspots "LAN" ports!
- Power-On the Hotspot
- Prepare and connect the Computer:
- Disable all WiFi-connections on the PC => Only the cabled connection should be active, which in general is much more stable/reliable!
- Connect the Computer to the LAN-port of the Hotspot => Do NOT connect the PC to "WAN" port of the Hotspot!!!
- Make sure the cable is undamaged and properly connected on both sides
- Test the cable/Internet e.g. by opening a browser and performing a basic Google-search "www.google.com"
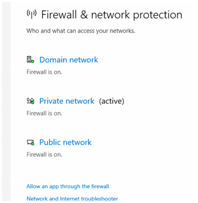
- Check the Firewall/Network settings to allow communication with local devices in the same network:
- Check the Internet Requirements:
- Using the browser navigate to the corpus.e Box: https://box.shooiq.com/
- Open and start the "Cloud Connection Test" - which can be found in the lower left corner:

- If any of the tests fails or result in a Timeout let the IT check and fix the shooIQ Network-requirements again:
https://download.shooiq.com/software/manuals/shooIQ_Requirements.pdf
- Prepare the Scanner/Mover:
- Make sure the Mover is new and has not been reconfigured / changed previously => This is crucial for Plug&Play!
[ If you have reason to believe your Mover does NOT have the default settings anymore please contact the Support! ] - Make sure the plate/stage is powered ON => Its Power-Button has to be lit up in white color
- Put the Mover at the magnetic Parking position
- Switch the Mover on ... after 10-20 seconds the LEDs should look like this:
(the LED named "connected" does NOT have to be lit up! - it's merely optional)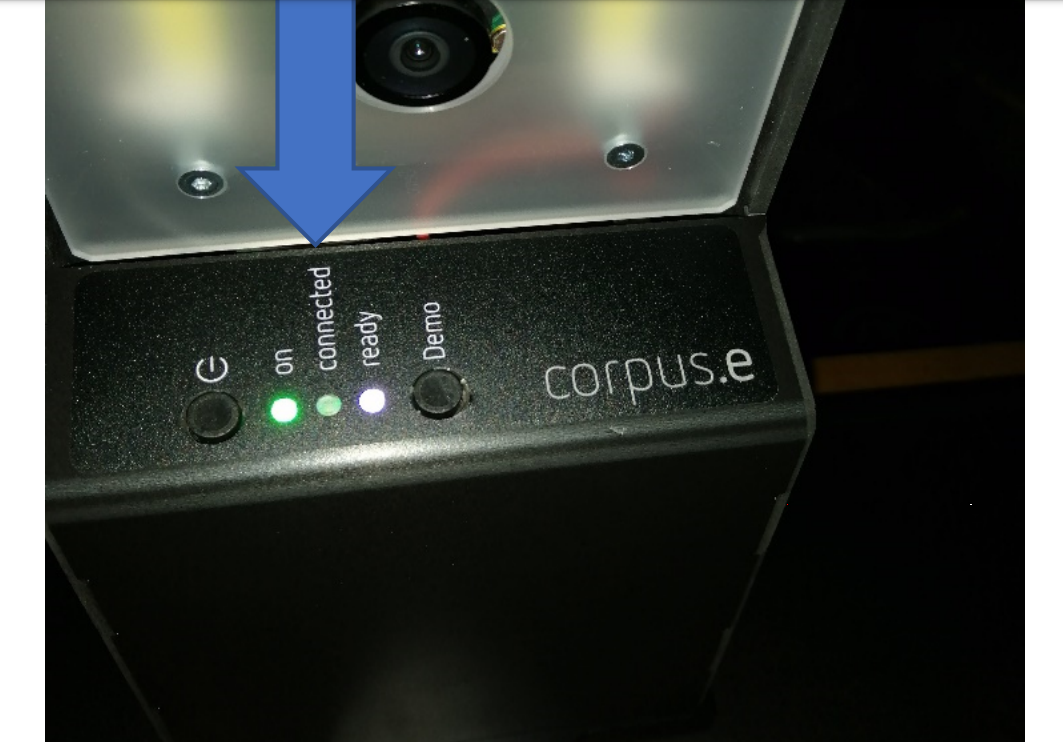
- Make sure the Mover is new and has not been reconfigured / changed previously => This is crucial for Plug&Play!
- Check the Network-Setup:
- Start the shooIQ-Software
- Login using your credentials
- Use the lower navigation bar to select the layer "Feet / Scan"
- After 0-20 seconds the screen should look something like this:
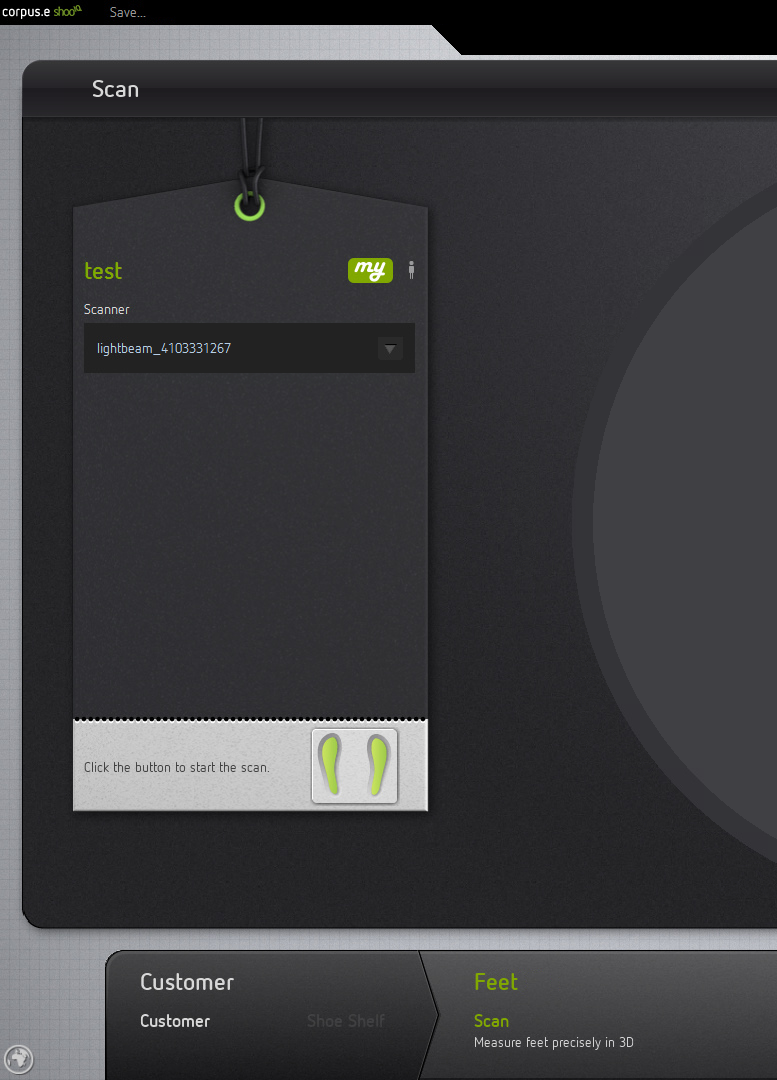
- The box named "Scanner" will show the serial number of the Mover
- The two little feet on the button will turn green -
indicating that everything is ready and a scan can be started!!!
If the Scanner is not ready despite having ensured all the above steps, please contact the support!
Related articles